Drain Camera Inspections: A Key Tool for Effective Plumbing Maintenance
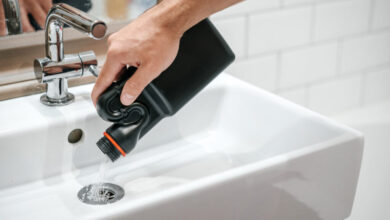
Drain camera inspections are a vital tool for maintaining the integrity of plumbing systems. They employ high-resolution cameras to identify blockages, leaks, and other issues hidden within pipes. This technology allows homeowners and professionals to pinpoint problems quickly and effectively, saving time and costly repairs.
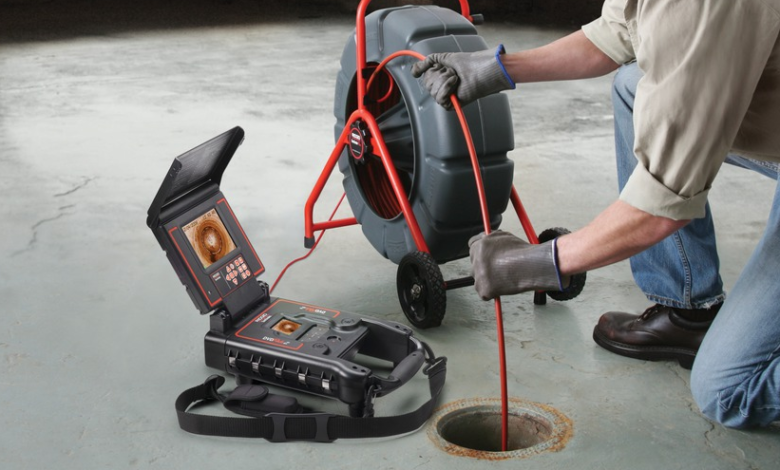
Understanding how drain camera inspections work can help one appreciate their value. The process involves inserting a flexible camera attached to a long cable into the drainage system, providing real-time visuals of the pipe’s condition. This inspection method eliminates the need for invasive digging or demolition.
For those facing recurring plumbing issues, exploring drain camera inspections offers a practical solution. By utilizing this advanced technology, they can gain insights into the underlying problems, leading to informed decisions about necessary repairs or maintenance.
Drain Camera Inspections Explained
Drain camera inspections utilize advanced technology to assess the condition of drainage systems. This process is essential for identifying issues quickly and accurately, leading to effective solutions.
Purpose and Benefits
The primary purpose of drain camera inspections is to accurately locate problems within drainage systems without invasive digging. This technique provides several benefits:
- Precision: The camera provides real-time visuals of the pipe interiors.
- Cost-Effective: Early detection of issues can prevent costly repairs and emergency service needs.
- Time-Saving: Quick identification of blockages or damage minimizes downtime for the property.
- Comprehensive Reports: Inspections often come with detailed reports and footage for future reference.
These advantages make drain camera inspections an invaluable tool for property owners and maintenance professionals.
Types of Drain Cameras
There are various types of drain cameras suited for different inspection needs. Key types include:
- Push Cameras: Lightweight and flexible, they are pushed manually through pipes for localized inspections.
- Reel Cameras: Equipped with a long cable, these cameras can navigate larger pipelines and are suitable for extensive inspections.
- CCTV Cameras: Offering high-definition footage, they are used for detailed assessments of sewer systems.
- Self-Leveling Cameras: These maintain an upright position, allowing for easier viewing of pipe conditions.
Choosing the right camera depends on the specific inspection requirements and the size of the drainage system.
How Drain Camera Inspections Work
Drain camera inspections involve several straightforward steps. Initially, the technician prepares the area, ensuring access points are clear.
Then, the camera is inserted into the drainage system. Utilizing a cable, the camera transmits live video footage to a monitor.
During the inspection, the technician looks for:
- Blockages: Identifying the location of clogs caused by debris or tree roots.
- Cracks: Spotting damage to pipes that may lead to leaks.
- Corrosion: Checking for signs of wear that could affect functionality.
After completing the inspection, a report is generated, outlining findings and recommending appropriate actions.
Best Practices for Conducting Drain Camera Inspections
Effective drain camera inspections require thorough preparation, careful execution, and diligent follow-up. This section discusses important practices to enhance the inspection process and ensure reliable results.
Pre-Inspection Preparations
Before starting a drain camera inspection, it is essential to gather all necessary equipment. This includes the camera system, a powerful light source, and backup tools like cleaning equipment.
Inspectors should also review the site’s history. Understanding previous issues can provide context for current inspections. Testing the camera for functionality ensures that it is ready for use.
Clear the drainage area to create a safe working environment. This eliminates obstacles that could impede the inspection. Proper safety gear, such as gloves and goggles, should also be on hand.
During the Inspection
During the inspection, operators should advance the camera slowly through the pipes. This allows for capturing clear images and minimizing the risk of damaging the camera.
Inspectors must watch for specific issues, such as blockages, cracks, or corrosion. It’s crucial to document findings in real-time, taking notes on the nature and location of any problems detected.
Using the camera’s features, such as pan and tilt, can greatly enhance visibility in tight spaces. Keeping communication open with team members aids in effective problem-solving on-site.
Post-Inspection Procedures
Once the inspection completes, the first step is to review all recorded footage. This helps verify findings and serves as a reference for any necessary repairs.
Creating a detailed report with images and descriptions of issues will aid in communication with clients. This report should clearly outline recommended actions for resolving detected problems.
Storage of the footage and documentation in an organized manner is crucial. This allows for future reference and comparisons during subsequent inspections.